Hi, I'm Irene and I am a Yoga teacher. I started practicing Yoga after being diagnosed with endometriosis, a chronic pain condition that affects one in ten women. I simply went to a trial class and never stopped ever since, it is my greatest passion and I bring it with me every day.
When I am not on the mat, I enjoy spending my spare time hiking, cooking healthy and nutritious meals and having a nice glass of wine.
When it comes to Yoga for pelvic pain, or more generically, Yoga for pelvic floor problems, it’s important lay a strong foundation before getting upside down. All Yoga poses can help with pelvic floor health, the reason why is that these muscles are essential in maintaining the right balance during postures.
Our pelvic floor muscles are really important in our health and wellbeing, whilst a lot of exercises promote only strengthening, I believe is equally important to learn how to relax these muscles in order to live pain free. So here’s some Yoga poses (asana) to strengthen and relax your pelvic floor, and find more awareness in this part of your body.
Are some of these poses to daunting for you? Not to worry! I have listed a series of modifications for beginners, and every video will show both options. Take it easy to start with, and work your way up!
These small sequence has been built with this particular order in mind, starting from the first to the last you will build up strength and finish with a deep and yummy stretch!
Tip for all poses: BREATH, and do your kegels. Your breath is the first starting point for all of these poses, never hold your breath, keep breathing and move your pelvic floor muscles accordingly. You can follow along with this Youtube video of Irene completing the poses here!
1- Half Chair (Ardha Utkatasana) to standing forward fold Modification: Chair pose (Utkatasana)
Benefits: Strengthens the pelvic floor and stretches the pudendal nerve.
Start standing, both feet on the ground. Check your pelvis position, if necessary tuck your tailbone in. Let your big toes touch and bend both knees whilst lifting your arms. If this is enough for you then stay here.
To progress to Half Chair Pose (Ardha Utkatasana): lift your left leg and flex your ankle, place your ankle across your right knee and try to push your left knee down. If necessary, you can use your hands to help you out. Stay here for at least 10 breaths, then if your body allows it, forward fold, stay here for another 10 breaths. Repeat on the other side.
2- Low Lunge (Anjaneneyasana) Modification: Low lunge with hands on knee
Benefits: Stretches the hip flexor.
Start in a forward fold, if your hands can’t reach the floor just place them on your knees or thighs.
Bend your knees and step your left leg behind you, align the right knee over the right ankle, then lower your left knee to the floor. Sweep your arms out and upwards, lift your pelvic bone towards your navel and find balance.
Try not to collapse on your hips, this can happen if you are really flexi, instead, tuck your tailbone under and push forward with your hips, you should feel a deep stretch in your front thigh and hip flexor.
Stay here for 10 breaths, repeat on the other side.
3- Bridge pose (Setu Bandhasana) with a block Modification: Bridge pose without a block
Benefits: Strengthens the pelvic floor
For this exercise your will need either a yoga block or a tick book. You can also use a small pillow if you don’t have a book available.
Lie on your back and bend your knees, to find where your feet should be, you want to make sure you can brush your heels with your fingers and keep the feet hip width apart. Place the block between your knees or thighs. Press your shoulders into the floor and start to lift the hips toward the ceiling.
You can clasp your hands behind your back or leave them on the floor. Squeeze the block/book/pillow in between your legs and tuck your chin slightly. Hold for 5 to 15 breaths and exhale to release.
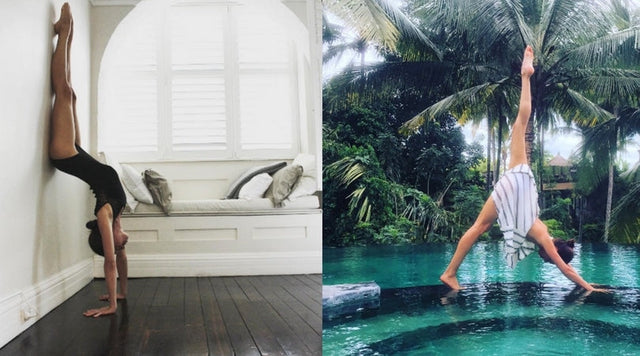
4- Headstand (Sirsasana) Modification: Dolphin pose (Ardha Pincha Mayurasana)
Benefits: strengthens the core and requires a strong pelvic floor control to maintain balance
If you are a complete beginner and don’t have any experience with yoga or fitness in general then jump to dolphin pose straight away. And even if you have a yoga practice, dolphin is a good place to start, so let’s start with that first!
From a 4 point kneeling position,bring your elbows on the floor. You can keep your knees bent or straight, whatever your body needs. Push your shoulders away from the ears and find strength in the upper back. Slowly walk your feet towards your face until the hips are above the shoulders. Hold for 10 breaths.
If you want to progress into a headstand:
To find the place that will touch the floor, place your thumb on the bridge of your nose and stretch your index finger at the top of your head, that’s the exact spot you will have to balance on.
Interlace your fingers and make sure your elbows are shoulder width apart (you can grab opposite elbows to figure this out). Now it’s time to bring your head on the floor and against your hands. Lift your knees off the floor and walk your feet in until your hips are on top of your shoulders.
Whatever you do here DON’T JUMP! You won’t get anywhere by jumping into a headstand, instead, push your arms into the floor and slowly bring one knee towards your chest and check in with your breath and your pelvic floor muscles. If you can, bring your other knee to your chest. This could be enough and the beginning of your inversion practice, but if it’s available to you, then stretch your legs up. Hold for 10 breaths.
To release bring one knee after the other to your chest and finish in child’s pose. Never stand up abruptly after an inversion.
Remember, the three key points for both of these poses are:
- Engage the pelvic floor muscles
- Keep breathing and never hold your breath
- Push your arms into the ground and push in between your shoulderblades
5- Upward Facing Dog (Urdhva Muka Svanasana) Modification: Cobra pose (Bhujangasana)
Benefits: Stretches the pelvic floor
Start on your belly, bring your hands on both sides of your ribcage, lift your chest and keep your neck long, activate your quads and lift your kneecaps off the floor. Your feet and pubic bone are pressing firmly on the ground. Bring your shoulder blades together and activate your core. This is cobra pose and might be enough for you today, to progress in upward facing dog, lift everything but your feet and hands off the floor.
Keep your arms and your core strong, if your hips touch the floor and/or you feel compression in the lower back, then go back to cobra pose. Hold for 5 breaths.
If you loved these yoga moves as much we we did then be sure to follow Irene on Instagram here!